
GitHub Hosts 获取并修改hosts
开头
有什么用?最直观的效果是GitHub图片可以正常加载,网页也稳定了。GitHub Hosts主要是通过修改host的方式加速GitHub访问,解决图片无法加载以及访问速度慢的问题。
全新的GitHub访问加速工具
特点就是稳定!
使用方法
1. 远程hosts
现在新增了DNS获取方案。
请查看 next hosts
本地 hosts 服务
本地 hosts 服务获取到的ip是经过本地测试,所以成功率较高。
而且会定时获取最新的ip,尽可能保证访问。
注意,该方案需要结合SwitchHosts一起使用,或者你也可以直接访问地址,手动复制。
macOS (Intel)
执行下面命令, 服务会运行在: http://localhost:8888
1 | curl -L https://github.com/ineo6/hosts/releases/download/v1.0.1/hosts-server-pkg-mac-x64.tar.gz | tar xzvf - |
macOS (Apple Silicon)
执行下面命令, 服务会运行在: http://localhost:8888
1 | curl -L https://github.com/ineo6/hosts/releases/download/v1.0.1/hosts-server-pkg-mac-arm64.tar.gz | tar xzvf - |
Linux (x64, amd64)
执行下面命令, 服务会运行在: http://localhost:8888
1 | curl -L https://github.com/ineo6/hosts/releases/download/v1.0.1/hosts-server-pkg-linuxstatic-x64.tar.gz | tar xzvf - |
Linux (ARM64)
1 | curl -L https://github.com/ineo6/hosts/releases/download/v1.0.1/hosts-server-pkg-linuxstatic-arm64.tar.gz | tar xzvf - |
Run on Linux (ARMv7 32bit)
执行下面命令, 服务会运行在: http://localhost:8888
1 | curl -L https://github.com/ineo6/hosts/releases/download/v1.0.1/hosts-server-pkg-linuxstatic-armv7.tar.gz | tar xzvf - |
Windows
在Releases界面下载 hosts-server-pkg-win-x64.zip ,解压后执行下面命令,服务会运行在: http://localhost:8888
1 | .\hosts-server.exe --port=8888 |
配置hosts教程
通过 SwitchHosts 自动更新
这里推荐使用 SwitchHosts 配置hosts,操作很简单,支持跨平台。
注意:首次使用先备份下本地hosts。
操作步骤
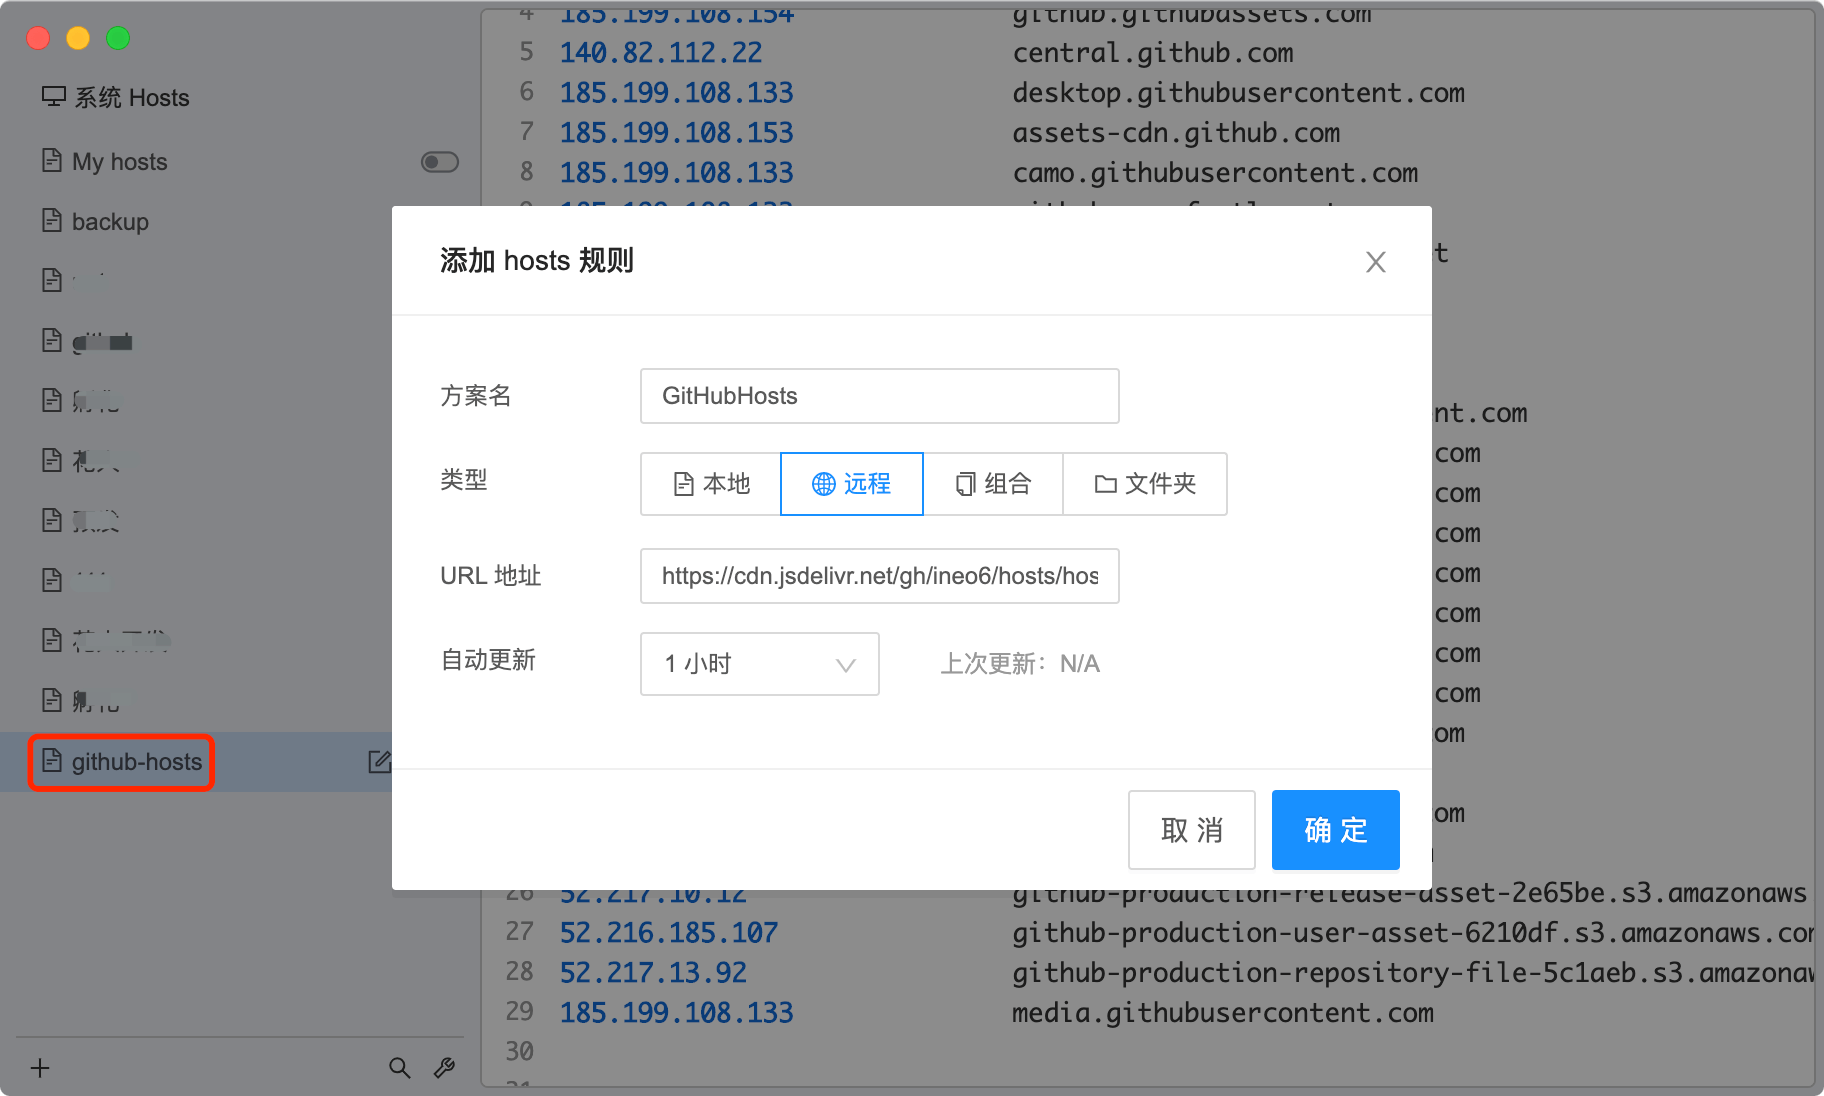
添加一条规则:
- 方案名:GitHub(可以自行命名)
- 类型:远程
- URL 地址:https://gitee.com/ineo6/hosts/raw/master/hosts (也可以改为你自己搭建的地址)
- 自动更新:1个小时(时间可自行调整)
这样就可以和最新的hosts保持同步。手动配置
macOS
hosts文件位置:/etc/hosts。macOS系统下修改需要按照如下方式:
- 首先,打开(访达)Finder。
- 使用组合键Shift+Command+G打开”前往文件夹”,输入框中输入/etc/hosts。
- 然后就会跳转到hosts文件位置。复制
注意:如果你使用
VS Code,可以直接用VS Code修改和保存,不需要复制文件。hosts文件到桌面上,鼠标右键右击它,选择「打开方式」—「文本编辑」,打开这个hosts文件,把前面的hosts内容复制进来。
然后把你修改好的hosts文件替换掉:/etc/hosts文件。
注意:如果弹出密码输入框,你需要输入你当前登录账号对应的密码。
最后刷新缓存:Windows1
sudo killall -HUP mDNSResponder
hosts文件位置:C:/windows/system32/drivers/etc/hosts。
将前文hosts内容追加到hosts文件,然后刷新DNS缓存:
1 | ipconfig /flushdns |
本博客所有文章除特别声明外,均采用 CC BY-NC-SA 4.0 许可协议。转载请注明来自 wututu-blog!
 wechat
 alipay
 QQ
QQ
相关推荐
.jpg)
.jpg)
.png)
.jpg)
.png)

评论
WalineDisqus
.png)
.png)
.png)